|
• DIAGRAM 3 • XR7 CONSOLE TEMPLATE • DIAGRAM 3a • DIAGRAM 3b • DIAGRAM 3c • DIAGRAM 3d • HAMMERHEAD FREE DRUM MACHINE  |
|
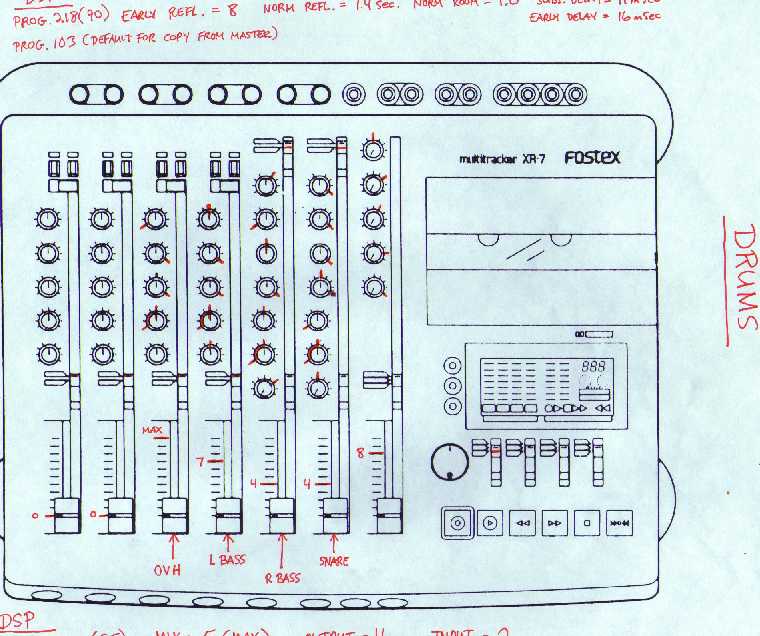
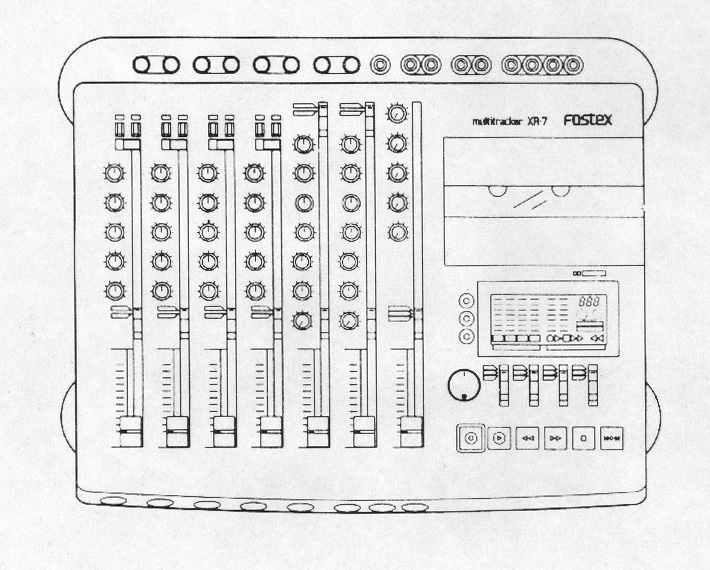
View from the basement: Part 3 : Don't worry, we'll fix it in the mix (archived 1998) Forget what sounds right, just get the right sound. If you’re looking to make a radio-friendly hook-demo this may actually be good advise. However, my love of music came long before the days of digital, and I’m afraid all the high gloss Judy Jetson crap I hear today just doesn’t do it for me. Unfortunately anyone who’s ever played in a cover band knows people expect a band to sound as good as their $900 car stereos or they’ll blow you off no matter how eloquently you pull off a song. They expect the same from recorded music, and are sophisticated just enough to know the difference (a little knowledge is a dangerous thing). Why is it then I never tire of hearing such flawed recordings as Thin Lizzy-Live & Dangerous from 1975? The right sound or what sounds right ? Forget it. Concentrate on the music. The setup described in part 2 is a simple self-contained nearly patchless ready-to-roll system that allows more focus on the songs and less on the equipment, and with proper mixdown can hold it’s own with anything so long as the music kicks butt. Few tips I’ve come across regarding initial “virtual” tracks have helped me any, mainly because there are so many variables involved such as what kind of instrument, amp, playing style, and the most important variable, microphones. A large diaphragm mic is definitely the way to go (except for snare maybe), but not mandatory. One thing that’s easy to get caught up into is trying to compensate for a cheap mic. Maybe it needs more EQ. So you go buy an EQ. Better, but not good. Maybe it needs more FX processing. So you go buy a processor. Good, but not great. Maybe it needs a tube pre-amp. And on & on until you’ve spent 3 times more than if you had just bought a really good mic in the first place. Then you can get a clean track with few effects as possible (you can add them later but you can’t take them out). Microphone configuration, placement and mixer settings are things for which there are no hard rules, and can only be perfected through trial and error. One thing that helps me is using a reference template for all mixer settings. I got lucky making my blank templates because the Fostex manual had a nice detailed overhead drawing of the mixer console. I just zoomed it to the size I wanted and made photocopies. I use a separate sheet for each instrument and mark the tics in red for every knob and fader so I know exactly where to set them next time. I also write down effects settings, amp settings, and anything else pertinent (see diagram #3 ). When I find an improvement it’s no big deal to make a new sheet or modify the existing one. Bottom line, if you find that “perfect sound”, WRITE IT DOWN. For anyone who owns this model Fostex I've included a printable blank console template HERE. Another thing that helps me stay organized is the use of track sheets (see diagram #3a , 3b ). I’m usually too lazy to index the songs but least I know what tape to look on. Now a few things about the ever elusive mixdown process. That integration of sonically diverse elements struggling to co-exist within the realm of stereo perception (I think I just hurt myself). As I mentioned earlier, the XR-7’s 5 &6 channels are set up to be the main stereo bus for mixdown, but I use them for track output loops allowing extended tailoring of those 2 tracks. I usually use channels 3 & 4 for track loops also so I can stick an EQ or something in there (see diagram #3c ). Each component of the whole mix is custom EQ’d, processed and compressed before it reaches the stereo bus stage instead of after when it’s hard to notch one thing without killing another. Usually the vocals and guitar need the most attention. The snare, bass drum and bass guitar I compress during the initial take. It’s difficult to compress drums when they’re all funneled to a single track, and bass is easy to compress at any stage of the process. For a more ambitious mix you can loop all four tracks and stick anything you like in the loop (see diagram #3d ). On every track I work the midrange, even exaggerate the midrange. There are so many “sonic spaces” discernable by the human ear between 500 and 1500 Hz that it’s easy to find everything it’s own little spot that stands out without drowning out. As for the final mix, "stereo" used to be just panning, but now it's more about "fattening". There are only two ways I know to create stereo imaging short of using 2 tracks for each take, and we only have 4 tracks to start with. One way is to run the left or right output to a delay set to slow the signal on one side for a few milliseconds. A pitch transposer will throw the left and right out of phase also, even at an un-hearable 1 or 2 cent shift. This is the electronic version of Phil Spector’s “Big hurt” sound called flanging, where two identical tapes are played simultaneously and in perfect sync. By gently pressing your thumb against the flange of the tape reel, the time/phase shift is exaggerated or flipped back and forth when the machines take turns leading. The second method is the one I use because it’s easier and requires no patching. I simply fatten the individual tracks using the DSP256 already on FX1. The combination of chorus, delay and reverb can be configured (with a little trial and error) to expand the time/phase differential between left and right anywhere from a subtle practice room feel to a lush, airy outdoor mood. Any additional imaging can be done by panning the individual tracks (I love splitting up 2 guitar parts into left and right). In the early days of stereo most recordings had every vocal and instrument split to either left or right, presumably to cut down on saturation, or maybe just because it was a cool new effect. This was fine if you listen to it with headphones or sit exactly in the middle of the speakers, but it's not a very practical mix and by the early 70s stereo imaging became the standard and still is today. So long as the vocals, bass and drums are imaged to both left and right it should sound full even if one speaker is blown. Bouncing tracks is something I shy away from. Not only does the signal degrade (with tape anyway), but once you’ve doubled up, the track is unrepairable. I only ping-pong to create lavish backgrounds for some of my “headier” material. (was that a Floydian slip?) If I feel like I need that fifth track, I will add another vocal backup during mixdown via a live mic in an empty input set up close. This takes a lot of getting used to. It’s hard to get the live sound to blend with the mix, it’s hard not to get side tracked monitoring the console and miss your cues, and if you screw up you have to start over from the beginning. It’s worth pursuing, however, because it gives you one last chance to fill out the thin parts a bit. I always take advantage of empty spots on the lead vocal track, too. It’s usually where the guitar solos end up. That’s where a compressor helps to soften the sudden level changes on a shared track. One other observation, tape hiss is always high on 4-trackers. I assume because since you use the full width of the tape there’s more hiss because there’s more tape. The NR circuit takes most of it out, but what helps more than anything is getting a good strong signal on your initial tracks. This means being more than generous with the VU meters. With digital it's the exact opposite. Back it down. Through trial and error you can get virtual tracks from 4-track cassette with that near CD sound (I think I heard that near CD sound once but at the time didn’t know what it was so I missed it). If you are lucky enough to get that sound, now you have to decide what to use for mixdown and how to faithfully replicate it from there. |
|
• DIAGRAM 3 • XR7 CONSOLE TEMPLATE • DIAGRAM 3a • DIAGRAM 3b • DIAGRAM 3c • DIAGRAM 3d • HAMMERHEAD FREE DRUM MACHINE |